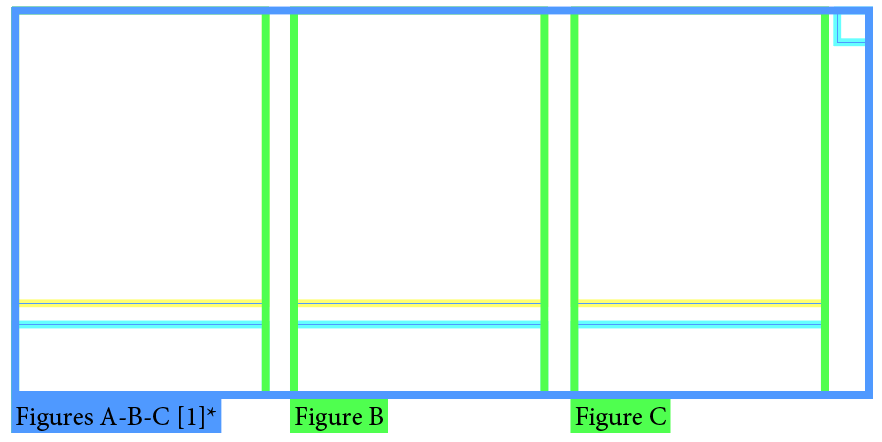
Typefi Elements are one of many building blocks you can use to build a Typefi-ready template in Adobe InDesign. For more intricate layouts, you may want to use nested Elements. A nested Element contains one or more Typefi Elements that are ‘nested’ within other Typefi Elements.
For example, consider a figure that contains an image, caption, and image credit.

All three function together as a unit and should not be separated. You wouldn't want the image on one page and the caption and credit on another page. To design this in a Typefi-ready template, you would create a nested Element.
You might also create nested Elements when designing sidebar boxes containing images (commonly used in travel guides) or step-by-step instructions with a corresponding image.
Step-by-step example
Before creating a nested Element, you should be familiar with creating and applying Inline, Fixed, and Floating Elements.
There are many different ways to create a nested Element, depending on your specific design needs. This step-by-step example will create a nested Element that holds three images and their corresponding captions.

Since these Fixed Elements will be nested within a Floating Element, they must exist on a master page that is not part of a Typefi Section.
Each image is an Element Image Frame, and each caption is an Element Content Frame. The Element Image Frame is grouped with its corresponding Element Content Frame, and a Typefi Element is applied to both. The Element should have the type Fixed.
There is a small Element Content frame in the corner. The small Element Content Frame ensures the Fixed Elements will be placed in the final output.
Then, a container Element contains the three Fixed Elements and the small Element Content Frame. The container Element should have the type Floating.
Elements within the container Element cannot be Floating; they can only be Inline or Fixed.
You can also connect the Element Image Frame and the Element Content Frame with a Typefi AutoFit relationship.
Create the example nested Element
1. Create a master page.
- Create a master page to build the nested Element.
- Name it X-Elements.
2. Create the Typefi Elements.
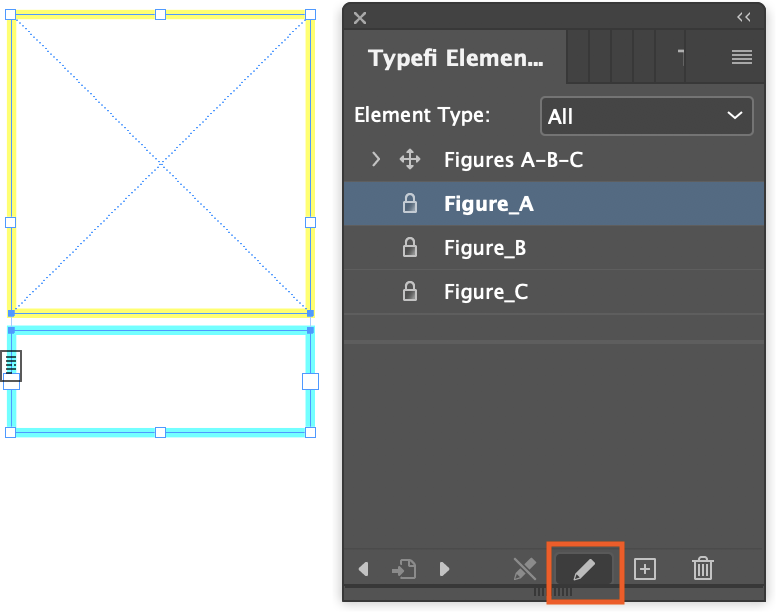
In the Typefi Elements panel, create four Elements:
- Create a Fixed Element and name it Figure A.
- Create a second Fixed Element and name it Figure B.
- Create a third Fixed Element and name it Figure C.
- Create a Floating Element and name it Figures A-B-C.
3. Create text and image frames.
- On the X-Elements master page, use the Rectangle Frame Tool to create an image frame.
- Below the Element Image Frame, use the Type Tool to create a text frame.
4. Apply Typefi Elements to frames.
- Apply an Element Image Frame to the image frame you just created (Object →
Typefi Frame Type → Element Image). - Apply an Element Content Frame to the text frame you just created.
- Select the Element Image Frame and the Element Content Frame and apply Figure A.

- Repeat steps 1-3 for Figures B and C.
5. Apply the Floating Element to the Fixed Elements.
In this last step, we will apply Figures A-B-C to Figures A, B, and C. But before we can do that, we need to create a small Element Content Frame inside the float. Otherwise, the Fixed Elements will not place in the final output.
- Create a small text frame next to one of the Fixed Elements.
- Apply an Element Content Frame to the text frame you just created (Object →
Typefi Frame Type → Element Content). - If it's not already, open the Typefi Elements panel.
- Select Figures A, B, C, and the small Element Content Frame, and apply Figures A-B-C to it.

Comments
0 comments
Please sign in to leave a comment.