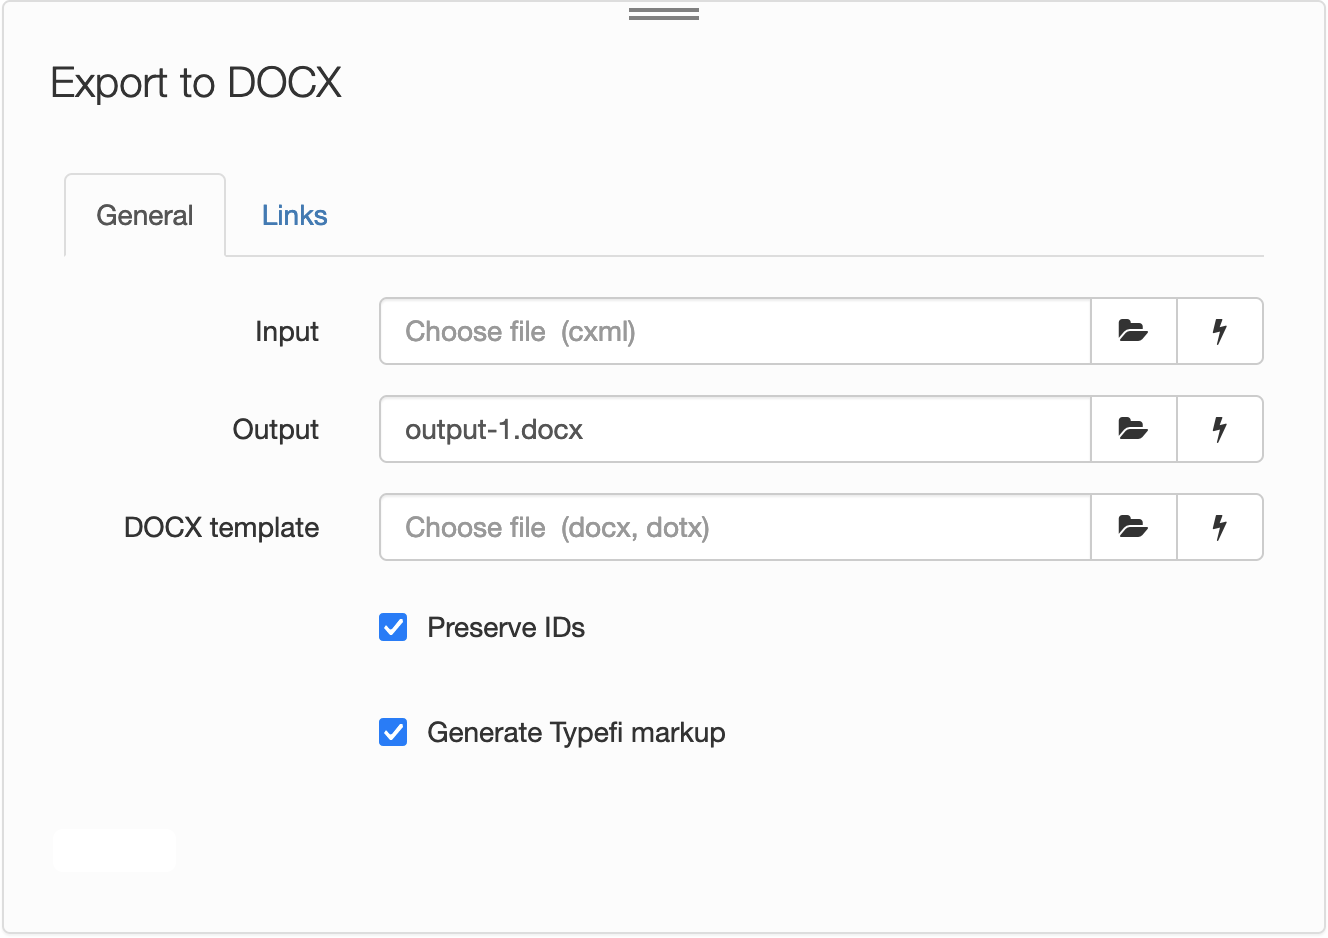
The Export to DOCX workflow action converts a Content XML file (CXML) into a Microsoft Word document (DOCX).
Export to DOCX is divided into two tabs: General and Links.
You can also use workflow variables to specify input fields. To insert a workflow variable, click the lightning bolt icon ![]() and choose a variable from the pop-up menu.
and choose a variable from the pop-up menu.
General
Use this tab to specify the input, output, and DOCX template. Choose to preserve IDs and generate Typefi markup.

| Field | Description |
|---|---|
| Input | The input CXML file. Click the Choose File icon |
| Output | The output DOCX file. Enter a name, or click Choose File The default output name is output-1.docx. |
| DOCX template | The DOCX template file (docx, dotx). The DOCX template contains pre-formatted settings for generating the output file. Click Choose File |
| Preserve IDs | Select Preserve IDs to preserve the original Element and Section IDs in the output DOCX file. Deselect to generate new unique IDs for Sections. Preserve IDs is selected by default. |
| Generate Typefi markup | Select Generate Typefi markup to create Typefi markup—for example, TPSSection, TPSTable, and TPSHyperlink—in the output DOCX file. Deselect to remove Typefi markup.Generate Typefi markup is selected by default. |
Links
Use this tab to choose whether to embed compatible images.

| Field | Description |
|---|---|
| Embed supported links | Choose whether to embed compatible images in the output DOCX file. If selected, any images specified in the input CXML file will be copied into the DOCX media directory. The output DOCX file will display those images. Image paths can be one of the following:
Embed supported links is selected by default. |

Comments
0 comments
Please sign in to leave a comment.