Mistakes happen, and sometimes you might reference a style or image in your content that doesn't exist in the Typefi-ready template (perhaps you need to check in the template). When this happens, Typefi automatically applies a default style to missing styles and images, and you will see a warning in the job log.
You can customise how Typefi displays content with missing styles or images.
Customising the appearance of missing styles
During the automated page composition process, Typefi creates a bright red "on-the-fly", or impromptu, style when it comes across content with missing paragraph, character, table, or cell styles.
When Typefi creates an on-the-fly style, you'll also see a warning like this in the job log: Paragraph style (paragraph-style-name) not found in template. Creating it on the fly.
You can customise the appearance of Typefi's on-the-fly style. For example, you can change the color, or use a custom font and an extra-large font-size so that the missing style stands out.
To change the color:
- In your Typefi-ready template (.indd), create a color group named TPS On-the-fly.
- Within the TPS On-the-fly color group, create an RGB process swatch named TYPEFI_ERROR_COLOR and set the value to #FF0000 (or whichever color you choose).
You can use this color to further customise a style for missing paragraph, character, table, and cell styles.
To specify a style for missing paragraph styles:
- Deselect everything on the page: choose Edit → Deselect All, or, with the Selection tool or Direct Selection tool, click at least 3 pixels away from any object.
- Create a paragraph style group named TPS On-the-fly.
- Create a paragraph style named TPS Missing paragraph style and specify the formatting attributes.
- Assign the TYPEFI_ERROR_COLOR swatch to the text fill of the TPS Missing paragraph style style you created in Step 3.
To specify a style for missing character styles:
- Deselect everything on the page: choose Edit → Deselect All, or, with the Selection tool or Direct Selection tool, click at least 3 pixels away from any object.
- Create a character style group named TPS On-the-fly.
- Create a character style named TPS Missing character style and specify the formatting attributes. Attributes you do not set are ignored; when the style is applied, the text retains the paragraph style formatting for that attribute.
- Assign the TYPEFI_ERROR_COLOR swatch to the text fill of the TPS Missing character style style you created in Step 3.
To specify a style for missing table styles:
- Deselect everything on the page: choose Edit → Deselect All, or, with the Selection tool or Direct Selection tool, click at least 3 pixels away from any object.
- Create a table style group named TPS On-the-fly.
- Create a table style named TPS Missing table style.
- Assign the TYPEFI_ERROR_COLOR swatch to the table border of the TPS Missing table style style you created in Step 3.
To specify a style for missing cell styles:
- Deselect everything on the page: choose Edit → Deselect All, or, with the Selection tool or Direct Selection tool, click at least 3 pixels away from any object.
- Create a cell style group named TPS On-the-fly.
- Create a cell style named TPS Missing cell style.
- Assign the TYPEFI_ERROR_COLOR swatch to the cell fill of the TPS Missing cell style style you created in Step 3.
Now, when Typefi comes across a missing style, it applies the style you specified instead of the generic on-the-fly style.
Customise the appearance of missing images
A missing image changes the Element Image Frame from a graphic frame to a text frame. The text frame is filled with either the @comment attribute on the missing <image> tag, or an error message strung with the original file path to the missing image.

You can style this by adding a default custom paragraph style to an object style applied to the Element Image Frame (object styles can include formatting for both graphic and text frames simultaneously; only the applicable styles are applied).
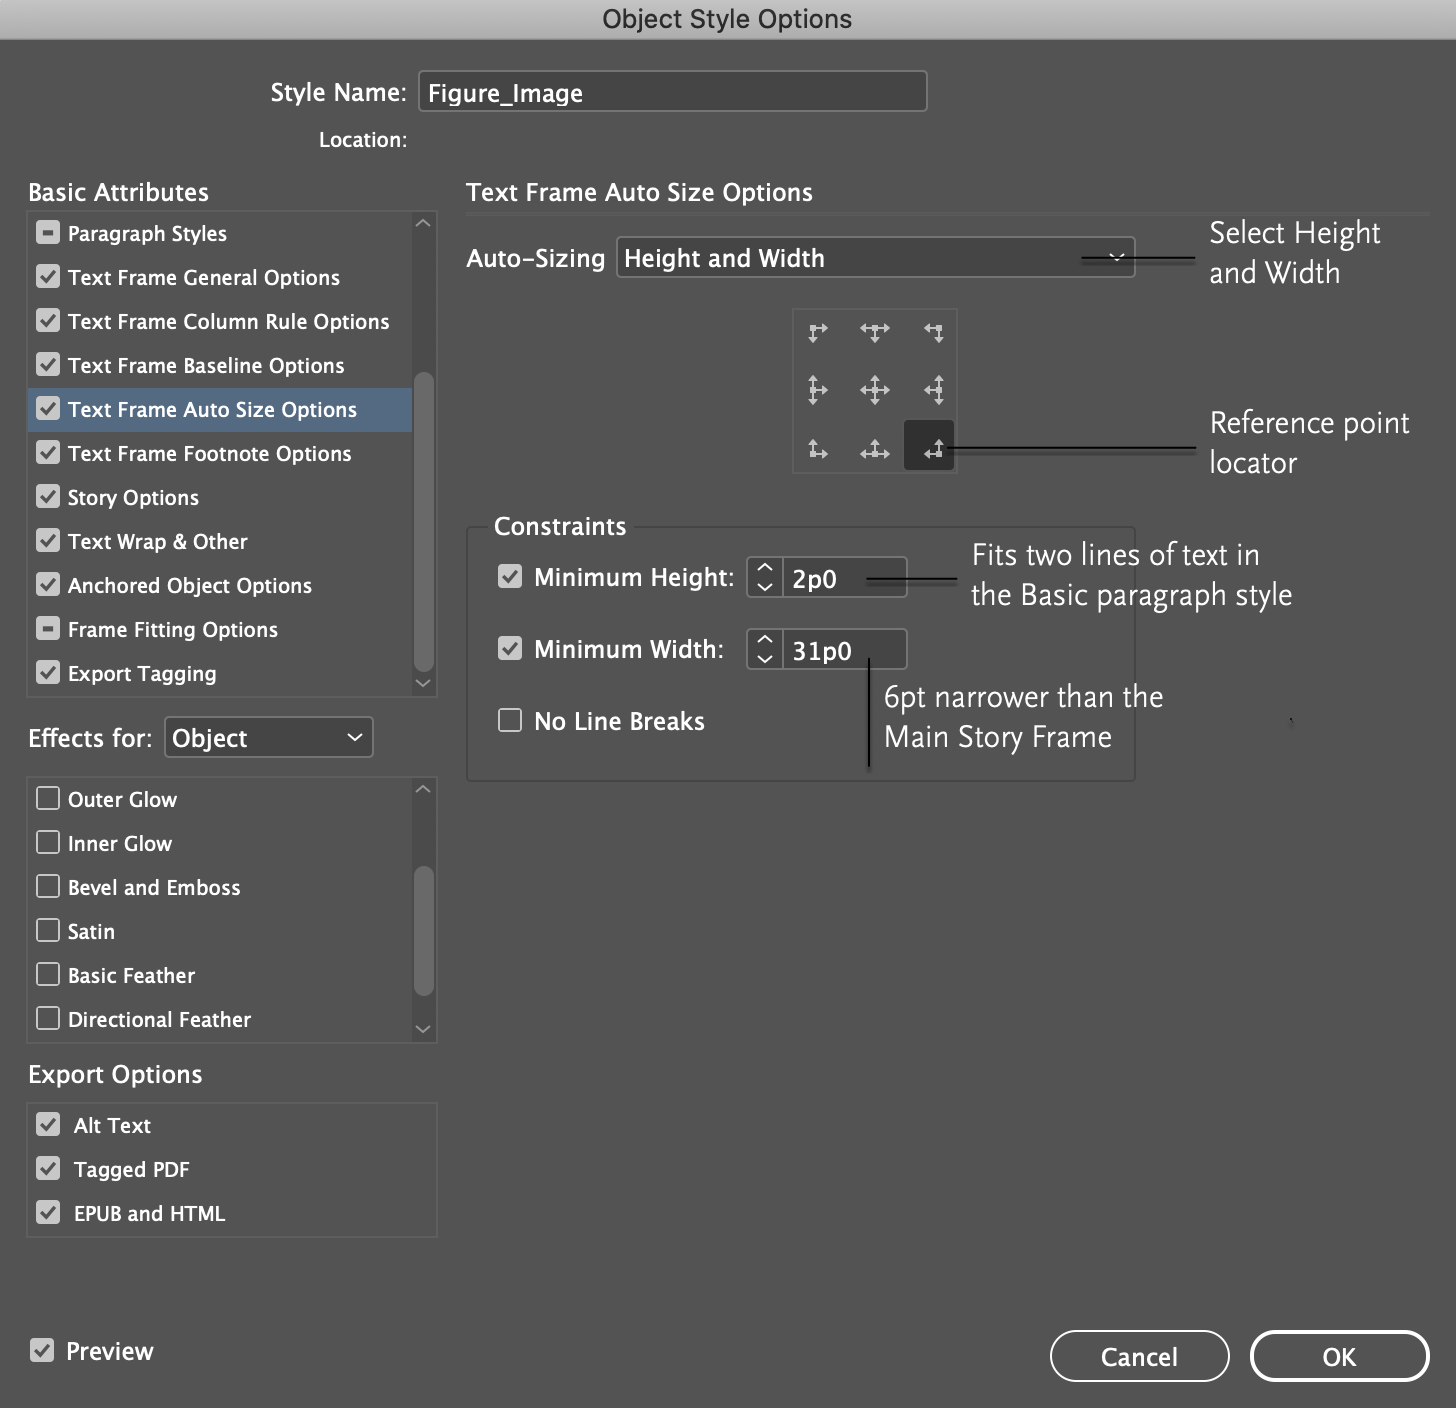
You can also configure the object style so that the frame automatically resizes in case of a missing image:
- Open the Object Styles panel (Window → Styles → Object Styles) and double-click the style that is applied to the Element Image Frame. Alternatively, right-click (Windows) or control-click (macOS) the style and choose Edit.
- In the Auto-Sizing pop-up window, choose Height and Width.
- Set the reference point to match the Expand From point of the Typefi Element Image Options.
If you don't remember where the Element Image expands from, right-click (Windows) or control-click (macOS) the Element Image Frame and choose Typefi Frame Options.
- Set the Minumum Height to 2p0 or 24pt (or whatever value will fit two lines of text with the Basic paragraph style applied).
- Set the Minimum Width to 6pt narrower than the Main Story Frame width.

- Click OK.

Comments
0 comments
Please sign in to leave a comment.